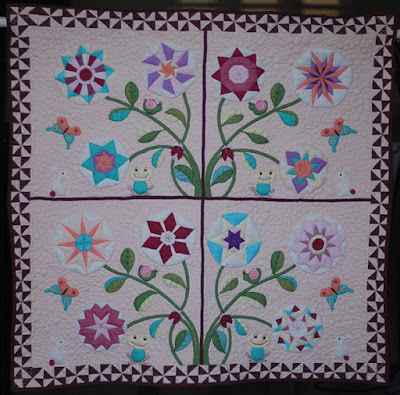
It’s partly about love, like a flower hugging a butterfly,
About being ‘madder than a March hare’
About the luck a ladybug brings,
About the gypsy in a snail and his wanderings,
About the journey of transformations a frog undergoes,
About Nature’s expressions of Joy in flowers,
But mostly, it’s about hope,
Hope for all the flowers of all the tomorrows.
Wall Hanging Quilt: 36.5’’ X 37’’ inches
My Story:
I was recently introduced to the ‘Paper Piecing’ technique and was fascinated by the infinite variations of
geometrical patterns made possible by this wonderful style. It took me less than a minute to decide that
Paper Piecing would be the predominant technique I will employ.
To ensure that the creatures – frog, lady-bug, rabbit, snail and butterfly – get the attention they deserve, I
have used Trapunto technique in combination with Patchwork. Thus, the creatures add to the delight and
festivity which the flowers radiate in my creation.
Finally, I chose pastel colours as they symbolize springtime.
Foots:
- Embroidery Foot
- Walking Foot
- All Purpose Foot
- ¼ inch Quilting Foot
Techniques:
- Paper Piecing
- Patchwork
- Hand Quilting
- Trapunto Method
- Free Motion Quilting
- Hand Embroidery
Pattern:
Materials:
Fabrics:
o 36 inch width Cotton Poplin for top
o 42 inch width Cotton for back
Polymer fibre batting
Polyester threads
Standard cotton embroidery threads
Accessories:
- Scissors
- Rotary Cutter
- Quilting pins
- Safety pins
- Stitch opener
- Cutting Mat
Needle Size 14 (Imperial Size)
Stationery
Process:
Step-by-Step Journey:
1. Drew the design on paper. It included designing, placement and actual size drawings of:
a. 12 flowers
b. Creatures – butterfly, rabbit, frog, snail and lady-bug
c. Leaves and stems
d. Background
e. Border
2. Finalized the colours, shades, fabric, techniques and patterns to be employed.
3. Made 12 Paper Piecing flowers – each one of a different design in 3 sizes. 4 flowers each of 6’’, 5.5’’ and
5’’ diameter. This reflects the diversity found in nature.
4. Marked and divided the fabric into 4 equal blocks with biased tape.
5. Placed the:
a. Stems – using Machine Stitch
b. Flowers – using Blind Stitch.
6. Used Trapunto method (stitched a layer of Polymer fibre batting beneath leaves / creatures) and basted
the leaves and creatures (butterfly, rabbit, frog, snail and lady-bug) on the quilt.
7. Made Pinwheel blocks and stitched them into a chain. Made the border of Wall Hanging Quilt with the
chain of Pinwheel blocks using Machine Stitch.
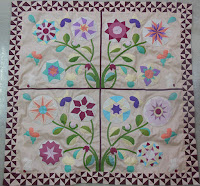
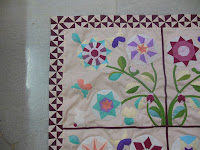
8. Clicked Photo Numbers 1, 2 and 3 depicting 25% completion.
 |
| Front |
 |
| Closeup |
 |
| Back |
9. Made sandwich of 3 layers:
a. Top Layer – Design fabric
b. Middle Layer – Polymer fibre batting
c. Bottom Layer – Back of Cotton fabric
10. Placed and Machine-quilted the 12 flowers – 3 flowers in each of the 4 blocks.
11. Machine-quilted the leaves and creatures and removed the Basting.
12. FMQ on the background.
13. Clicked Photo Numbers 4, 5 and 6 depicting 50% completion.
14. Completed FMQ on the background
15. Completed FMQ on the Pinwheel blocks on the border
16. Clicked Photo Numbers 7, 8 and 9 depicting 75% completion.
17. Completed Binding and stitched the Name-tag
18. Completed Hand Embroidery on all creatures, leaves.
19. Added sleeves to hang the Wall Hanging Quilt.
20. Clicked Photo Numbers 10, 11 and 12 depicting 100% completion.
Important Points:
Always used bobbin of white colour to match the colour of the back fabric
Adjusted the pressure foot pressure while quilting on the flowers to ensure stitches don’t skip
Pictures coming soon.


